• Skip to primary navigation
  • Skip to main content
  • Skip to primary sidebar
  • Skip to footer
GuideYouBest

GuideYouBest

Best Product Reviews

  • Kitchenware
    • Cooking
    • Bakeware
    • Coffee
  • Tips

Tips

How to reheat steak? Learn how to correctly reheat steak.

February 28, 2023 by Medha

How to reheat steak

Table of Contents

  • Reheating a steak in a microwave
  • Reheating a steak in an oven
  • Reheating a steak on the stovetop
  • Reheat the steak with some beef broth

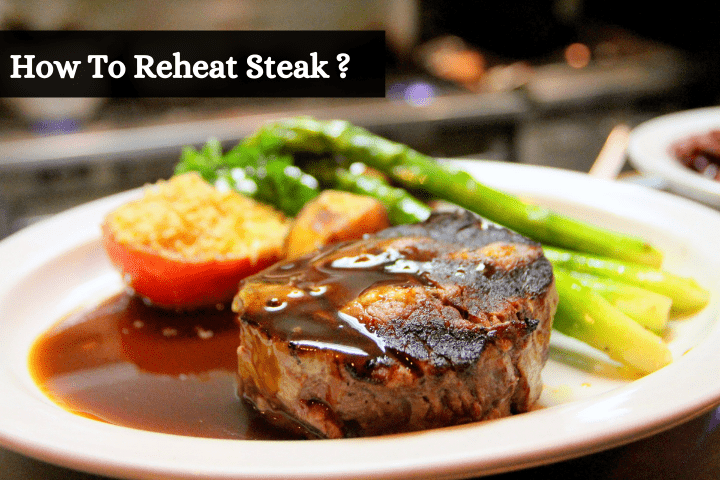
We know how hard it is to get a perfectly cooked medium-rare steak right the first time in a skillet. And it’s obviously not too much to expect the leftovers to taste just as good, if not exactly the same, the next day. Let’s try to answer the question, how to reheat steak? We know that it is essential to reheat steak the right way to avoid the meat from becoming rubbery.

And so, we’ve got a few tricks up our sleeve that will make reheating steak as simple as it can get for all of us. Let’s dive in shall we?

Below mentioned are four best ways to reheat a steak

1. Reheating a steak in a microwave

While the first preference generally is to reheat a steak in an oven, you could always choose to go for a microwave in case you are running short of time. The first thing to do here, is take a microwave dish, a deep dish if possible and place the steak in it.

Cover the dish with a microwave-safe plastic cover and place it in the microwave. Then set the microwave to medium heat and cook the steak for 30 seconds on each side. After every 30 seconds, flip the steak onto the other side and continue the process for 2-3 minutes. The steak is now ready to be served.

2. Reheating a steak in an oven

This is the best way to reheat steak. Although reheating steak in an oven may take some time, the results are quite promising. Now, for this process, you need to first preheat the oven for 250-270 degrees. On a wire rack, place a baking sheet and then place your steak on it. Cook the steak in the oven for about 20-30 minutes until the internal temperature reaches 110 degrees.

The next step is to heat a stove pan and add a tablespoon of oil. Place the steak into the pan and sear it. Cook each side for about one minute. By this time, the steak will turn juicy on the inside and lightly crispy on the edges. Serve the steak and get ready to eat.

Related Article : Best Pans To Cook Steak

3. Reheating a steak on the stovetop

This method of reheating grilled steak may seem simple but requires your complete attention. Bring the leftover steak from the refrigerator in a dish and let it cool down to room temperature. Then place the steak on the skillet and add a teaspoon of olive oil around it. Sear the steak on both sides for a couple of minutes and cover the lid after the steak is evenly cooked on both sides . Serve the reheated steak.

4. Reheat the steak with some beef broth

One other way to reheat a steak on the skillet is by adding beef broth to it. Place the skillet onto the stovetop on medium heat. Add some beef broth and wait until it bubbles up. When the broth starts to heat up, put the steak and cook it just for a few minutes on both sides. The broth adds moisture to the steak and enhances its flavour. Now the steak is ready to be served hot.

Conclusion

While no one likes to let leftover steaks go to waste, it is important to know how to reheat steak the right way. All techniques mentioned above are the best possible ways to reheat steak and also retain its moisture. We hope you try them all and have an enjoyable experience while you are at it!

Interesting Articles for You:

  • Differences Between Cupcakes And Muffins
  • How to reheat lasagna
  • Best Pans for Pancakes
  • Best Lasagna Pans
  • Best Pans To Cook Steak
  • Best Stovetop Espresso Makers

Filed Under: Tips

Skillet Vs. Frying Pan: What is the difference between them?

February 28, 2023 by Medha

Skillet Vs. Frying Pan: What is the difference between them?

Table of Contents

  • Skillet Vs. Frying Pan
  • What is a saute pan and skillet? How does it differ from a skillet and a frying pan?
  • What is a skillet and saute pan used for?
  • What should you cook in a saute pan and in a frying pan?
  • What is a skillet used for and  characteristics 
  • What are the main types of skillets available?
  • What are the characteristics of a skillet and a saute pan?
  • What are the different types of frying pans?
  • What is the difference between rivetless and riveted handles?
  • What frying pan should I buy? Natural finish or Non-stick pan?

If you are a beginner in your kitchen, you may have been plagued by this question,’ what is the difference between a skillet and a frying pan,’ ‘what does a skillet look like’ and others. It is quite often that people refer to a skillet as a frying pan and vice-versa, but who is to say which term is correct and interchangeable?

This article will help you understand the difference between skillets, frying pans and saute pans.

Skillet Vs. Frying Pan

While both skillets and frying pans are used for similar purposes, let’s get one thing straight – they are different!

A frying pan is shallow, has a flat base, is curved around the edges and does not come with a top lid. You can sear food, flip them, shallow-frying anything at high temperatures and expect more awesome results.

A Skillet on the other hand is generally made from a heavier metal such as stainless steel or cast iron, has more depth than a regular frying pan and has slanted edges to retain the liquid in the food. In most cases, skillets are designed with a helping handle or loop in addition to the regular handle for better support. If you are looking to answer the question ‘is a skillet a frying pan’, the short answer is yes, it can be used to fry food and honestly, it delivers great results!

What is a saute pan and skillet? How does it differ from a skillet and a frying pan?

Saute pan is a deep frying pan with vertical edges that is essentially used on stove tops to fry or braise food items. The larger diameter, deep base and straight edges of a saute pan allow us to cook foods with liquids easily without any spillage. Like skillets, saute pans also come with a helping loop and a long handle that helps with slow-cooking recipes such as liquid broths and gravies.

What is a skillet and saute pan used for?

A skillet and saute pans generally have a flat base, and curved edges and are generally used to shallow fry or cook foods faster. Some skillets such as cast iron pans are heavier than frying pans and allow you to slow-cook your meals. Additionally, skillets can be used in an oven to bake food as well.

Saute pans on the other hand are deeper than regular frying pans and have high vertical edges. They are best used for cooking food items with liquid or broth, or foods that need to be slowly cooked and have a higher chance of spillage if they were cooked in a regular frying pan.

What should you cook in a saute pan and in a frying pan?

Frying pans and saute pans are interchangeable if you are able to cook dishes in either of the pans. However, there are some dishes that are best cooked in a frying pan and some that need a saute pan. For example, it is easier to shallow fry meat, saute veggies, fry eggs, and make curries on the frying pan. This is because the flat base allows more area for food to be cooked evenly, requires heat for lesser time as compared to foods cooked in a saute pan and makes it easier to flip and toss the food as needed.

In a saute pan, you will cook gravies with meat, stew, broth and anything that is liquid and requires a higher cooking time. It is also used for deep frying food items

What is a skillet used for and what are some characteristics of a skillet?

Skillets are heavier and slightly deeper than frying pans. They are oven-safe and have higher heat retention as compared to frying pans. Since they are made with heavier metals such as cast iron, aluminium etc, they also come with an extra handle for support along with the main handle. They are generally non-stick and made of non-toxic materials.

What are the main types of skillets available?

There are three materials commonly used to make skillets;

1. Cast-iron skillet
This is the most common type of skillet available in the market. Cast-iron is heavy, but food cooked in this skillet always tastes flavourful. Maintenance of a cast-iron skillet is slightly on the higher side, however, using the right techniques, you can protect the skillet from getting spoiled and save it for generations to come.

2. Aluminium skillet
These skillets are lighter in weight compared to cast-iron. They can be used to cook simple food items such as egg fry and searing meat. However, one thing about aluminium pans is that they are not dishwasher-safe. So, they may get damaged if you don’t maintain them well.

3. Stainless steel skillet
Stainless steel skillets are slightly heavier than aluminium but lighter in weight as compared to traditional cast iron skillets. They are preferred by professionals and beginners alike, these skillets have high heat retention capabilities.

What are the characteristics of a skillet and a saute pan?

To help you understand your purchase better, below are a few characteristics of skillets and saute pans.

The tossing ability
Skillets offer more of a tossing ability as compared to saute pans. This is due to the shallow depth of the pan. So you can toss and turn, crepes, pancakes and omelettes easily.
Saute pans on the other hand have more depth and hence it is difficult to toss the food inside. It is best for foods requiring slow cooking.

The weight
Saute pans have a higher depth, and high edges and they come with two side handles. This means that they are heavier than skillets. The design allows us to cook curries, rice, gravies, broth and fry all kinds of meat. Skillets help us to toss, turn and flip the food items easily since the depth of the pan is not as much as a saute pan. So, depending upon your needs and cooking requirements, select an appropriate pan.

The capacity
Skillets have a broad base and a lower capacity as compared to saute pans. The latter on the other hand can be extensively used to cook gravies, stews, soups or other foods that have more liquid.

What are the different types of frying pans?

Just like skillets, frying pans are also available in different types. They come in aluminium, stainless steel, carbon steel etc and have non-stick materials coated on the base of it that don’t allow food to stick to the surface. Interestingly, some pans are made to be used on stove tops and some are specifically designed to be used on induction stoves such as steel

What is the difference between rivetless and riveted handles?

To understand the difference, let us first understand the meaning of rivets. Rivet refers to a steel-like screw. A rivet is used to secure the handle to the pan. It is safe and does not need to be tightened often. Having riveted handles on a pan means that the maintenance is slightly higher although it fastens the handle safely to the pan.

Rivetless handles have their advantages too. It increases the durability of the pan and requires less maintenance.

What frying pan should I buy? Natural finish or Non-stick pan?

Both the pans come with their set of advantages. The maintenance of the natural finish pans will be slightly higher than the non-stick pans, but they also enhance the flavour of the food. Non-stick pans on the other hand have low maintenance and can be used by beginners as well.

Conclusion

Frying pans, skillets and saute pans, all of these have different uses in the kitchen. Depending upon the requirement of the food, it is better to choose a pan. Even if you do not have all three types of pans, it is quite alright, you can substitute one for the other. This will not alter the taste of the food. However, since all three pans have specialities of their own, it is recommended to use certain pans for cooking those types of foods.

Interesting Articles for You:

  • How to Reheat Pizza in an Air Fryer
  • Best Pizza Pans To Bake Crispy Pizzas
  • Best Frying Pans to Cook Steak
  • How to reheat lasagna

Filed Under: Tips

How to clean a stainless steel coffee pot?

February 26, 2023 by Medha

How to clean a stainless steel coffee pot -Guideyoubest

Table of Contents

  • METHODS TO CLEAN STAINLESS STEEL COFFEE POT
  • METHODS OF CLEANING COFFEE STAINS FROM STAINLESS STEEL
  • DAILY CLEANING TIPS ON HOW TO CLEAN STAINLESS STEEL COFFEE POT
  • GUIDELINES TO AVOID STAINS ON STAINLESS STEEL COFFEE POT

  • BENEFITS OF STAINLESS STEEL

Stainless steel utensils are a part of every kitchen. A stainless steel coffee pot is one of the statement additions you can bring to the stainless steel collection in the kitchen.
Mornings with aromatic coffee brewed in stainless steel coffee pots make the day blissful, so a perfect coffee needs perfectly roasted beans and a clean coffee pot.

Unfortunately, we have all experienced our stainless steel coffee pots getting fuzzy because of the strong coffee stains and complex pot design.

You might find yourself hooked on this one question, how to clean a stainless steel coffee pot?

Relax!

We have listed a few perfect ways to remove coffee stains from stainless steel coffee pots, making aromatic coffee every day, so read along!

METHODS TO CLEAN STAINLESS STEEL COFFEE POT

Stainless steel adds a glitz to your kitchen’s appearance, but stained stainless steel makes it look dull. Cleaning stains regularly is the key to keeping your kitchenware intact and shining.

Removing coffee stains from stainless steel coffee pots is a challenging task. So, here are a few methods to clean stainless steel coffee pots.

  1. How to use baking soda to clean stainless steel coffee pot?
    Baking soda is an all-time favourite household ingredient for cleaning the stainless steel coffee pot. It takes the minimum time to clean the coffee pot.

Steps for removing stains from stainless steel-

  • first, pour the baking soda into the stainless steel carafe
  • fill the carafe with hot water
  • scrub the coffee carafe with the bottle brush
  • empty the dirty water from the carafe
  • rinse thoroughly with cold water.

 2.  How to clean a stainless steel coffee pot using lemon?
At times, the coffee stains in the stainless steel coffee pot become stubborn and hard to clean.

  • Steps to remove the hardened coffee-
  • wash the metal coffee pot thoroughly, free from any cleaning agent residue
  • cut a lemon and squeeze it into the metal coffee pot
  • add salt
  • swirl the lemon and salt mixture to cover all stains
  • leave it overnight
  • wash the pot with the rough side of the dish sponge
    rinse with water
  • repeat the process if necessary

3. How to clean a metal coffee pot using a commercial cleaner?

  • Commercial cleaners for removing the stains from stainless steel coffee percolators are available in the market.
  • Commercial-grade coffee cleaners also clean plastic and glass. It can remove the natural coffee oils that adhere to the stainless steel carafe’s surface.
  • Others use the coffee pot cycle to thoroughly clean the entire machine, while some commercial cleaners call for application and scrubbing.

4. How to clean a burnt coffee pot using a dishwasher pod?

Using a dishwasher pod is the easiest method to clean stains from stainless steel. It takes only 30 minutes to clean the coffee pot.
Steps to clean the coffee pot-

  • have a dishwasher liquid or pod handy
  • boil water in a container
  • add the dishwasher liquid or pod and hot water into the coffee pot
  • let it sit for 30 minutes
  • pour this liquid out and rinse thoroughly.

5. Without using any dishwashing soap

Do you need a dishwasher-safe cleaning solution for a stainless steel coffee pot? Do not be concerned if you do not have dish soap on hand. Traditional cleaning supplies such as baking soda and white vinegar help to remove the stains.

  • By mixing baking soda and hydrogen peroxide
  1. Fill your stainless steel coffee pot halfway with warm water before adding 1 cup of baking soda.
  2. Scrub the interior of the saucepan with your dish brush.
  3. empty and rinse the pot.
  4. Repeat by adding 1/2 cup hydrogen peroxide 
  5. Add two teaspoons of baking soda to the saucepan. 
  6. Empty and rinse the pot.
  • By mixing white vinegar and water

Mix vinegar and water in equal amounts in the coffee pot and bring it to a boil. After a brief period of boiling, remove the pot from the heat and allow it to cool fully. 

Clean the interior of the coffee maker with a brush or sponge, drain the mixture, and rinse it until there is no vinegar smell left.

METHODS OF CLEANING COFFEE STAINS FROM STAINLESS STEEL

The pigment of coffee is prominent, and often very hard to remove the stains. So below are a few methods on how to clean burnt coffee pots and how to remove coffee stains from stainless steel.

  1. By using salt, vinegar and ice 

The easiest way to remove coffee residue and hard water stains with the least effort and frustration is by using salt, vinegar and ice.

You will need-

  • 6 Ice Cubes
  • ½ cup of White Vinegar
  • 2 tbsp of Table Salt
  1. Fill your stainless steel coffee pot with ice cubes.
  2. Fill the saucepan with two teaspoons of table salt and a half cup of white vinegar.
  3. Gently stir the liquid in the saucepan until the stain washes off.
  4. Empty and rinse the pot.

2. By using a denture tablet

Denture tablets are a good option for cleaning a stainless steel coffee pot since they remove germs and tough stains.

Having denture tablets as coffee pot cleaner miracle workers on hand is always a good idea because they are excellent at eliminating stains brought on by coffee and mineral deposits from hard water.

You will need

  • Denture Tablet
  •  Warm Water
  •  Bottle Brush
  1. Fill your stainless steel coffee pot halfway with warm water, then add one denture tablet.
  2. Wait a few minutes while the denture pill dissolves in the liquid.
  3. Scrub the pot to remove stains and hard water buildup with a bottle brush.
  4. empty and rinse the pot.

DAILY CLEANING TIPS ON HOW TO CLEAN STAINLESS STEEL COFFEE POT

Often simple solutions work the best to clean the stainless steel coffee pot. 

Consistent maintenance is the simplest method to stop stains, such as water marks and rust, from tarnishing your stainless steel pot and protect your fresh coffee from spoiling aromas.

A daily checkup

  1. Start by heating water on the stove or in a tea kettle.
  2. After that, add some dishwashing detergent and halfway pour hot water into the stainless steel coffee pot.
  3. Scrub the interior of the saucepan lightly with a dish brush. Instead of cleaning, leave the soapy water in place for 30 minutes.
  4. Drain the unclean water and give the pot a good rinsing in cold water.
  5. Use a soft towel to dry the pot.

GUIDELINES TO AVOID STAINS ON STAINLESS STEEL COFFEE POT

Even though certain coffee makers may be dishwasher-safe, it’s usually best to hand wash and thoroughly dry a stainless steel coffee pot because they rust easily.

Tip #1: 

Clean your stainless steel coffee maker after every use with hot water and dishwashing soap to prevent buildup over time and maintain it in good condition.

Tip #2: 

To prevent rusting, avoid leaving coffee, hard water, or any remaining moisture on your stainless steel coffee pot for a lengthy period.

Tip #3: 

To prevent scratching stainless steel and causing permanent damage to your coffee maker, avoid using aggressive cleaners or cleaning products like bleach and steel wool.

BENEFITS OF STAINLESS STEEL

Following are some of the many benefits of stacking your kitchen with stainless steel –

  1. Sustainability- stainless steel, made of 70% scrap metal, meaning there is no need to dig earth resources.
  2.  Long-Term Durability- has a longer shelf life because of its resistive properties.
  3. Aesthetic Appearance- the material makes it elegant and attractive.
  4.  Heat Resistance- because of its oxidation resistance, even at high temperatures.
  5. Corrosion Resistance- resistant to corrosion due to acid, alkaline solutions and saline environment.
  6.  Hygenic- easy to clean and sanitise.

Conclusion

Coffee pots made of stainless steel look fantastic in kitchens but require special maintenance. Your coffee carafe will ultimately spoil and become useless if you don’t maintain it clean.

You may do this in different ways. We’ve just included a handful of them here. So that you never go a morning without an aromatic cup of coffee and keep your coffee maker clean.

Although stainless steel is often resistive, it does need a little maintenance to stay in good condition. Most people use coffee pots frequently in the kitchen, and stainless steel is a terrific material for a coffee pot. Washing your stainless steel coffee pot after each use is the best method to keep it looking brand new. Although occasionally that isn’t possible, our cleaning advice will enable you to remove the coffee stains.

Regularly cleaning and maintaining your coffee machine is a quick and easy way to increase its lifespan and the calibre of your brews.

Interesting Articles for You:

  • How to Reheat Pizza in an Air Fryer
  • How Many Calories are in an English Muffin
  • How to reheat steak
  • Skillet Vs. Frying Pan

Filed Under: Tips

How Many Calories are in an English Muffin?

February 20, 2023 by Medha

How many calories are in an English muffin

Table of Contents

  • Nutrition Facts About English Muffins
  • How are English muffins healthy?
  • What can you eat with healthy English muffins?
  • Allergies caused by English muffins
  • What should you choose between English muffin and bread?
  • Frequently Asked Questions:

What is it about an English muffin that screams ‘healthy’? Let’s find out with calorie count and how you can jump on the bandwagon. For those of us who haven’t heard of it before, an English muffin resembles a burger and is essentially a favorite breakfast item.

This yeast-clad muffin is usually cut into two halves and served with bacon, eggs, and sausages. For those of you who love jams and marmalades, throw some on the muffin and you are good to go!

Nutrition Facts About English Muffins

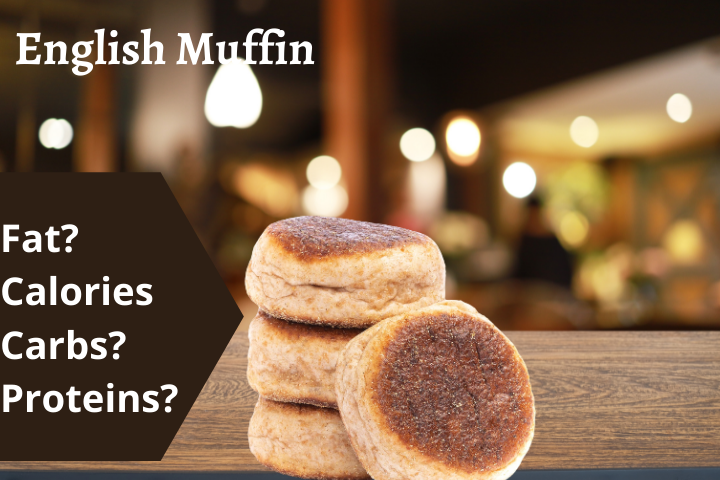
According to Calorieking an average English muffin contains 132 calories. Among this, the calories accounting for the English muffin nutrition breakdown is as follows:
Protein is 4.8 g
Total fat is 1.4g
Carbohydrate 23.5 g
Sodium 2.7g and
Dietary fibre 198 mg.

While carbs in English muffins make the bulk of the ingredient, according to the glycemic index, fats, proteins and micronutrients constitute the rest of space.

How are English muffins healthy?

English muffins contain high fibre, protein, but are low in fat content.
When consumed without butter or other sides, they contain the least amount of calories.
English muffins taste crispy when toasted simply or with a ting drop of butter and are quite a healthy option for breakfast.

What can you eat with healthy English muffins?

High fibre in English muffins are quite a rage during breakfasts and brunches and there are a variety of items that you can pair with it.
One way is to cut the muffin into half, toast both sides, apply a thin layer of butter and serve it with coffee.

The second is to eat the English muffin as a side with eggs benedict, which is a common American breakfast or serve it with bacon, cheese or sausage in the form of a sausage.
Third, you could always have the English muffin with jam, honey or marmalade.

Allergies caused by English muffins

We know that the main ingredient in English muffins is wheat, and wheat contains gluten. Anyone allergic to gluten must avoid the English muffin. Oftentimes, the gluten allergy gets confused with celiac disease which is an abnormal immune system reaction.

What should you choose between English muffin and bread?

Both brand and English muffins are favourite items in the breakfast menu, however, if you are looking to switch things up and shift to a healthy regimen, then English muffin is a better option, and here’s why! While the active ingredient in both bread and English muffin that gives your body energy is carbohydrates, bread contains this ingredient in a higher composition as compared to calories in English muffin.

Additionally, English muffin is a good source of calcium too.if you are someone who loves to bake muffins of all kinds, here’s a list of the best muffins pans you could use to bake them.

Frequently Asked Questions:

1.How can one best store English muffins?

One good thing about English muffins is that they can be stored. Once you have opened the packet and picked the ones you need, you can store the rest in an airtight resealable bag and place it in the freezer. To avoid any spoilage, freeze each English muffin separately.

2.Can English muffins be frozen?

As discussed in the above section, English muffins can be stored separately and kept frozen in separate resealable bags. When it’s time to serve, unseal one of the packets, defrost it or heat the muffin for close to 30 seconds and serve hot. English muffins can be frozen for approximately 2 months.

Interesting Articles for You:

  • Best Pizza pans
  • Best Grill Pans
  • Best Pans for Pancakes
  • Best Lasagna Pans
  • Best Bundt Pans for Baking Cake
  • Best Stovetop Espresso Makers

Filed Under: Tips

Differences Between Cupcakes And Muffins! Ready To Get Your Mind-Blown?

February 20, 2023 by Medha

muffin vs cupcake

Table of Contents

  • Difference Between Cupcake and Muffin?
  • Ingredients Used?
  • Differences In The Batter And The Baking Process?
  • Filling And Frosting?
  • Differences in Texture?
  • Difference Between Their Preparation and Storage?
  • Do Size and Shape Matter?
  • How To Eat Muffins And Cupcakes?

There are two kinds of people, the ones who know the difference between cupcakes and muffins and the others who don’t. If you belong to the former group, well congratulations you are all set, however, if you belong to the latter half of the section, who use the terms muffin and cupcakes interchangeably, then here is your chance at redemption!

You may recognise muffins from cupcakes based on their appearance, but that’s not enough. The major differences between the two lie elsewhere and if you are a big fan of either of them or love both, or are haunted with the question ‘is a cupcake without icing a muffin’ it’s time that you know the differences.

Let’s get you started on this journey!

What’s The Difference Between Cupcake and Muffin?

Some of your friends may have you believe that muffins and cupcakes are more or less the same, and you may start to wonder what is the actual difference between muffin and cupcake, but mark our words, they aren’t the same! It’s true that both muffins and cupcakes are bite-size and satisfy our cravings, but there is a massive difference between the ingredients used and the baking process.

Cupcakes by definition are mini sugary cakes with colorful scrumptious frosting topped with generous doses of sprinkles and chocolate sauces.

Ingredients used to make muffins are akin to those of cupcakes, however, muffins tend to be less sugary and more coarse. They are dome-shaped and are eaten as savories too.

What Ingredients Are Used To Make Muffins and Cupcakes?

Cupcake, as the name goes, is a smaller version of the cake, which means the ingredients contain eggs, flour, milk, and high amounts of sugar and fats such as butter. This is separate from the ingredients used in the frosting.

Muffins are made from more wholesome ingredients like healthy flour alternatives and vegetable oil instead of butter. The batter includes a dash of seeds and nuts as fillers. Even though, not all muffins are considered healthy, some still contain less sugar than cupcakes.

What Are The Differences In The Batter And The Baking Process?

If you still, for the life of you, cannot figure out the difference between cupcake and muffin and still think it’s a cupcake vs muffin battle, let’s give it another shot.

One of the major differentiators is the batter and the baking process. Cupcakes are mostly mixed using the caking method and in a single bowl, where butter and sugar are mixed first to get a smooth texture. The eggs, milk and flour are added subsequently and beaten continuously to get a lump-free and fluffy batter. This also leaves cupcakes with tighter crumbs than muffins.

Muffins are made using the popular muffin method, where wet and dry ingredients are kept in separate bowls, then the wet ingredients are poured over the dry ones (not the other way round!) to avoid gluten development. Both the ingredients are beaten for a short duration, unlike in the case of cupcakes to get coarse crumbs. Muffins are also eaten as savoury items and they may include cheese, veggies, onions etc.

What About The Filling And Frosting?

Cupcakes come with a generous dose of fillings such as chocolates, fruit, cream cheese, jams etc and are topped with colourful frosting and toppings.

Muffins are loaded with dry fruits, seeds, nuts, in their savoury version may include veggies and cheese too.

How About The Differences in Texture?

Cupcakes are beaten for a long time to eliminate lumps and give them a smooth cake-like texture. The crumbs are softer and closely bound together.

Muffins on the other hand are slightly hard and crispy and coarse in texture too. Some of them may include more fillings than cupcakes.

What Would Be The Difference Between Their Preparation and Storage?

Cupcakes are served cold, or at room temperature, but Muffins can be served hot or cold depending on where it is sweet or savoury.

Do Size and Shape Matter?

There is no hard and fast rule about the size of your cupcakes or muffins, it honestly depends on what works for you. When talking about shape, cupcakes are slightly on the flatter side to make room for delicious creamy frosting whereas muffins are made to rise to resemble the dome shape. Use good quality muffin pans to make the best muffins at home.

How To Eat Muffins And Cupcakes?

A good cup of coffee and muffins is usually a great breakfast combination (if you are looking for breakfast ideas English muffins are a healthy option too!). However, if you choose to start and end your day with cupcakes, well who’s to say no to that! (Just don’t end up with a sugar rush).

Conclusion

In conclusion, cupcakes and muffins are different when it comes to ingredients and the making process, however, they are never really at a war with each other, it’s never muffin vs cupcake! You could be a fan of both or neither, it’s really up to you! But the next time someone tells you that a muffin is a cupcake without frosting or asks if; ‘are muffins cake’? We are sure you are well equipped to take on (and win) the debate!

Interesting Articles for You:

  • Best Stock Pots
  • Best Grill Pans
  • Best Pans for Pancakes
  • Best Lasagna Pans
  • Best Bundt Pans for Baking Cake
  • Best Stovetop Espresso Makers


Filed Under: Tips

How to reheat lasagna so you do not regret batch baking?

February 10, 2023 by Medha

How To Reheat Lasagna Without Drying Out

Table of Contents

  • How Long Can You Keep Lasagna In The Fridge Or A Freezer?
  • Some Tips For Reheating Lasagna
  • How To Reheat Lasagna In A Microwave?
  • How To Reheat Lasagna In An Oven?
  • How To Warm Up Lasagna In A Skillet?
  • Delicious Twists on Classic Lasagna
  • Safety Precautions to Take While Reheating Lasagna

It takes a fair amount of time to whip up some delicious lasagna for one meal, so we totally understand why you’d want to bake in bulk the first time itself and also store some for the next meal. However, if you think that frozen lasagna is going to taste exactly like the one who prepped a night or two before, you couldn’t be more wrong! Unless you follow the right techniques to reheat a frozen lasagna, your efforts may not bear fruits.

It’s time to hop over and discuss some ways in which you can not only safely store the leftover lasagnas, but also reheat them as when you like. We’ll guide you through the entire process of reheating a frozen lasagna so you always end up with piping hot lasagnas every single time!

How Long Can You Keep Lasagna In The Fridge Or A Freezer?

Ideally, a fresh batch of lasagna lasts around 3-5 days in the fridge, however, in a freezer, it can last up to 3 months. All you need to do is pack the leftovers in an airtight container so as to not let the moisture seep in and toss the box into the freezer.

Now, reheating frozen lasagna might take 10-15 mins more than your anticipated time, but we assure you, the results are worth it!

Some Tips For Reheating Lasagna

1.Using a thermometer:
The lasagna is said to be reheated correctly if the internal temperature of the lasagna reaches 165℉. Hence, it’s better to keep a thermometer handy, so each time you need to check the temperature of the lasagna, you are ready.

2.Thawing frozen lasagna:
If you are doubtful about thawing the lasagna before reheating it, here’s what we think, it really depends on how much time you have to spare before your mealtime. If you have a couple of hours, surely thaw it. However, if have anything less than an hour, by all means, you just reheat the lasagna using any of the techniques mentioned below.

You are now ready to get started, so scroll below and read about ‘how to reheat lasagna?’

How To Reheat Lasagna In A Microwave?

Heating lasagna in a microwave may be a tad bit time-consuming, but it’s also quite rewarding. If you are looking to reheat frozen lasagna, then we recommend you thaw it in a refrigerator overnight before you place it in the microwave. Now, follow the below-mentioned steps, to get sizzling hot lasagna going in no time!

  1. Place 1-2 pieces of lasagna into a microwave-safe container and sprinkle some water on top. Now, if you intend to place more than 1 slice of lasagna side by side, then ensure there is sufficient space between the two slices.
  2.  Cover the container with microwave-safe plastic, or lid and set the timer to 90 seconds.
  3. After the timer runs out, check the lasagna and reheat it for 90 seconds in intervals for about 5-6 minutes. Each time you remove the container, check if the cheese has melted and the lasagna is steaming hot.
    Note: It is recommended to repeat this process in intervals to avoid the lasagna from getting overheated and exploding and to maintain the moisture level in the slice.
  4. Now, the lasagna is ready to be served, enjoy it with a drink/beverage of your choice!

How To Reheat Lasagna In An Oven?

  1. While heating a lasagna in the oven is one of the best ways to ensure that the flavour and taste remain intact, it probably takes the longest time. So if you want to take this route, brace yourselves, the journey is long, but the results are worth it.
  2. It’s well-known that reheating lasagna in oven takes about 30-45 minutes, so make sure you are prepared in advance for that. Now, that you are ready, set the oven temperature to 350℉ degrees and prep your lasagna. Sprinkle some water over the lasagna slices and cover them with aluminium foil and before placing them in the oven.
  3. Every few minutes, open the oven door to check on the slices with a toothpick until you see the cheese bubbling on the edges, and your lasagna turning soft. At this point keep a thermometer with you, as per purewow, your lasagna is ready to be served when the internal temperature reaches around 160℉.
  4. Serve the lasagna and devour it with a beverage of your choice!

How To Warm Up Lasagna In A Skillet?

If you are in a mood to put your culinary skills to test, how about attempting at reheating lasagna in a skillet. It’s going to turn out so good, we are sure, you will make it a regular thing!

  1. Get your heavy duty skillets out and place them on the stove, set the stove on to a medium flame and wait. Place the frozen lasagna onto the pan (As a best practice, just place one or two slices of lasagna).
  2. Sprinkle a decent amount of water on the slices, cover the skillet with a lid and let it fry.
  3. Remove the lid from time to time, move the slices around and let it cook for about 20 minutes.
  4. If you like, you can step up your game by adding a slight crisp to lasagna. Just open the lid and let the bottom fry for about 5 minutes.
  5. When you use a skillet, your lasagna will take a lot less time to cook, than in the oven. Now, you are ready to serve and savour your lasagna!

Delicious Twists on Classic Lasagna

Classic lasagna is always the showstopper at a party/get-together, and if you get it right, you may even be showered in compliments. However, this does not mean that you cannot steer away from the lasagna and experiment now and then or try your hand at interesting variations with lasagna.

Some interesting lasagna recipes you can make using the best lasagna pans are zucchini lasagna, one-pot lasagna, lasagna stuffed shells and others. Additionally, you can always try baking bite-sized lasagnas using muffin pans.

Safety Precautions to Take While Reheating Lasagna

How many times can you reheat lasagna?
Lasagna can be stored for 3-5 days in the refrigerator and frozen for about 3 months. Although, no rule dictates how many times you can reheat the lasagna when it comes to reheating lasagna from fridge, heating it just once is enough. This is because reheating the same slice again and again can make it dry and inedible.

When should you discard your lasagna?
A lasagna lasts for 3-5 days in the refrigerator and can be frozen for about 3 months (remember to keep them in an airtight container both times). However, needless to say, if your lasagna smells foul when you remove it from the fridge or looks slimy, it’s better to do away with it.

Conclusion

A classic frozen lasagna when reheated using the correct techniques can taste delicious. Batch-baking is not a bad option at all if you follow the right way to store, freeze and reheat the leftover lasagna. Now, there are tons of ways to reheat a lasagna just like we discussed, some requiring more time than others. However, we recommend you choose the option that’s most convenient for your needs. So, let’s get baking, shall we?

Interesting Articles for You:

  • Differences Between Cupcakes And Muffins
  • Best Grill Pans
  • Best Pans for Pancakes
  • Best Lasagna Pans
  • Best Bundt Pans for Baking Cake
  • Best Stovetop Espresso Makers

Filed Under: Tips

  • Go to page 1
  • Go to page 2
  • Go to Next Page »

Primary Sidebar

Recent Posts

  • 13 Best Pans To Cook Eggs for Every Morning Breakfast in 2023
  • 13 Best Pots and Pans for Deep Frying in 2023
  • 11 Best Frying Pans to Cook Steak in 2023 – Buying Guide
  • 11 Best Loaf Pans for all Dessert Needs & Dinner in 2023
  • How to reheat steak? Learn how to correctly reheat steak.

Footer

  • Facebook
  • Instagram
  • Pinterest
  • Twitter

About GuideYouBest

GuideYouBest reviews a variety of products and displays top picks in each category.

  • Kitchenware
  • Tips
  • Privacy Policy for GuideYouBest
  • Terms and Conditions
  • Cookie Policy
  • Partnerships & Advertising
  • Contact Us

Copyright © Guideyoubest 2021